Better Than Domino’s Cheesy Breadsticks (Easy Copycat Recipe!)
This post contains affiliate links. Click here to read my affiliate policy.
Last Updated on July 31, 2025
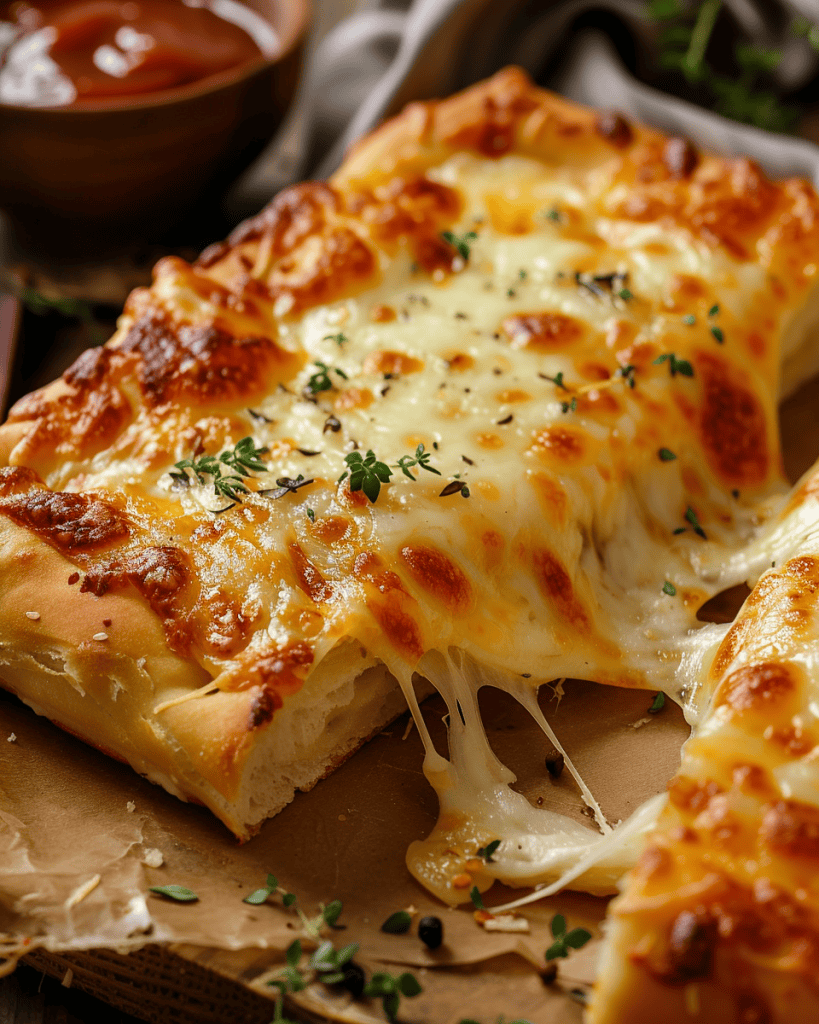
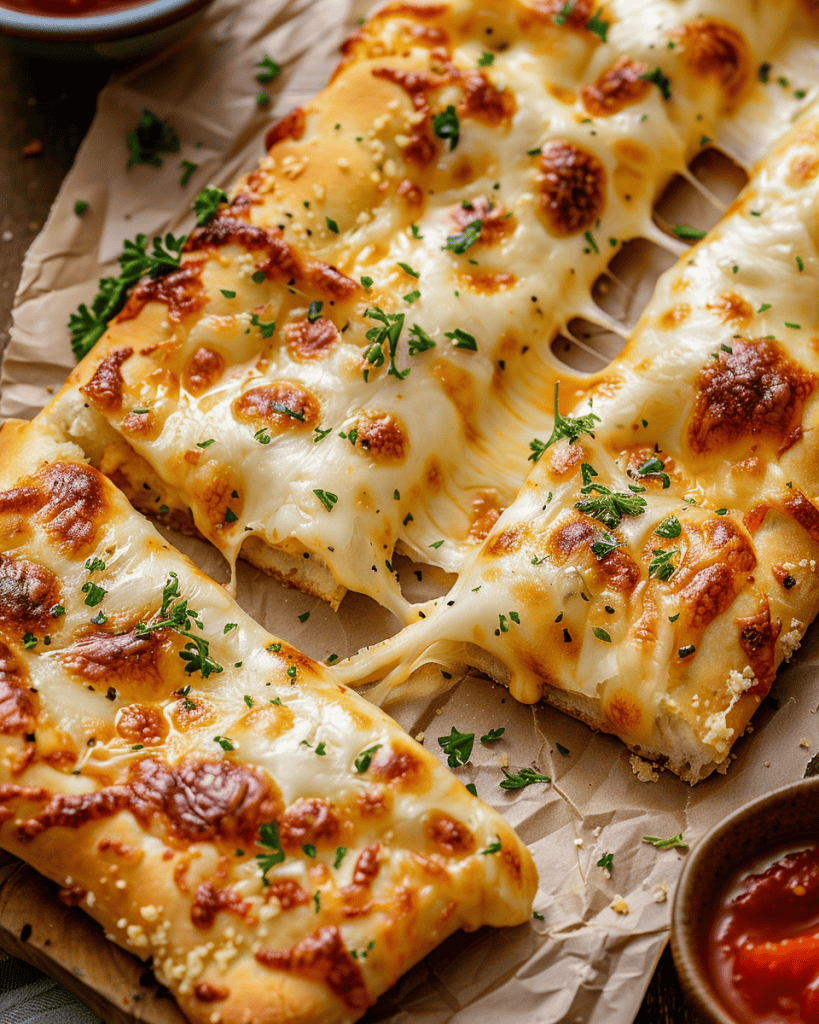
You know how some days just call for carbs and cheese? Not a salad, not a smoothie… I’m talking full-on, gooey, buttery bread that stretches when you pull it apart. The kind that makes you pause mid-bite like, “Wait. Did I just make this at home?” Yeah. These cheesy breadsticks are that moment.
If you’ve ever crushed a box of Domino’s Cheesy Bread by yourself, this recipe is your new best friend. It’s soft and fluffy on the inside, perfectly crisp on the edges, and loaded with mozzarella that melts like a dream. Plus, you get that garlicky, buttery flavor in every bite—without the mystery ingredients or the delivery guy judging your 9pm snack choices.
Let’s break it down.
Why You’ll Love This Recipe
- It’s easy. You can use homemade dough or grab some from the store.
- It’s cheesy AF. This is not the time to be shy with the mozzarella.
- It hits like takeout—but better. Fresher, hotter, cheaper.
- Perfect for parties or lazy nights. No forks, no fuss—just dip and devour.
Ingredients You’ll Need
Dough (Homemade or Store-Bought)
- 2¼ tsp active dry yeast (1 packet)
- 1 tsp sugar
- ¾ cup warm water (not hot—think bathwater warm)
- 2 cups all-purpose flour
- 1 tsp salt
- 1 tbsp olive oil
👩🏽🍳 Short on time? Just grab a ball of pizza dough from Trader Joe’s or the refrigerated section of your grocery store.
Toppings
- 2 tbsp butter, melted
- 1 tsp garlic powder
- 1 tsp Italian seasoning
- 1½ cups shredded mozzarella cheese
- ¼ cup grated Parmesan (optional, but amazing)
- Marinara or ranch for dipping
Step-by-Step: How to Make Cheesy Breadsticks
Step 1: Make the Dough
In a medium bowl, combine the yeast, sugar, and warm water. Stir gently and let it sit for 5 to 10 minutes until it looks foamy on top. If it doesn’t foam, your yeast might be dead—start over with fresh stuff.
Once it’s foamy, stir in the flour, salt, and olive oil. Mix until a dough forms, then knead it on a floured surface for about 5 minutes until it’s smooth. It should feel a little tacky but not sticky.
Place the dough in a greased bowl, cover with a towel, and let it rise in a warm spot for 30 to 45 minutes—until it doubles in size.
Step 2: Shape + Top
Preheat your oven to 425°F (220°C). Line a baking sheet with parchment paper.
Punch down your dough and roll it into a rectangle about ¼-inch thick. It doesn’t have to be perfect—rustic is cute.
Brush the top with melted butter. Sprinkle on garlic powder and Italian seasoning like you mean it.
Now cover that baby in mozzarella. Be generous. No one ever said “this has too much cheese” and meant it. Add Parmesan if you want a little extra saltiness and depth.
Step 3: Bake
Bake for 12–15 minutes or until the edges are golden and the cheese is bubbling like lava.
If you want those irresistible golden cheese spots, flip on the broiler for 1–2 minutes at the end—but watch it closely so it doesn’t burn.
Step 4: Slice + Serve
Let it cool for a few minutes (if you can wait), then slice it into strips using a pizza cutter or sharp knife.
Serve with warm marinara, garlic butter, or ranch. Pull. Dip. Repeat.
Tips for the Best Cheesy Bread Ever
- Use low-moisture mozzarella. It melts better and won’t make the bread soggy.
- Let the dough rest after rolling. Just 5–10 minutes helps it bake more evenly.
- Bake on parchment paper. It makes cleanup easier and helps the bottom crisp up.
- Double the recipe for a crowd. These go fast.
Variations to Try
You can totally remix this cheesy bread depending on your mood (or your fridge).
- Spicy: Add red pepper flakes to the butter or top with sliced jalapeños.
- Cheesier: Add cheddar or provolone alongside the mozzarella.
- Bacon it up: Crumble cooked bacon on top before baking.
- Make it herby: Mix fresh chopped parsley or basil into the melted butter.
Want a stuffed version? Fold the dough in half over the cheese, crimp the edges, and bake as a pocket. Like a cheesy Hot Pocket, but 100x better.
Can I Make These Ahead of Time?
Yes! You can prep the dough in advance and store it in the fridge overnight. Just bring it to room temp before rolling it out.
Baked breadsticks will keep in the fridge for 3–4 days. Reheat in the oven or air fryer for that fresh-out-of-the-oven taste.
Ingredients
For the Dough (or use store-bought pizza dough):
- 2 ¼ tsp active dry yeast 1 packet
- 1 tsp sugar
- ¾ cup warm water
- 2 cups all-purpose flour
- 1 tsp salt
- 1 tbsp olive oil
For the Topping:
- 2 tbsp butter melted
- 1 tsp garlic powder
- 1 tsp Italian seasoning
- 1 ½ cups shredded mozzarella cheese
- ¼ cup grated Parmesan cheese optional but recommended
- Marinara for dipping
Instructions
Step 1: Make the Dough
-
In a bowl, mix warm water, sugar, and yeast. Let it sit for 5–10 minutes until it gets foamy.
-
Stir in the flour, salt, and olive oil. Knead for about 5 minutes until smooth.
-
Cover and let it rise for 30–45 minutes, or until doubled in size.
-
(Or skip this and use store-bought dough—we’re not judging.)
Step 2: Shape + Bake
-
Preheat oven to 425°F (220°C).
-
Roll out the dough into a rectangle on a lightly floured surface—about ¼ inch thick.
-
Place on a parchment-lined baking sheet or pizza pan.
-
Brush with melted butter and sprinkle garlic powder + Italian seasoning all over.
-
Add mozzarella evenly across the top. Sprinkle Parmesan if you’re feeling fancy.
-
Bake for 12–15 minutes or until the cheese is bubbly and the edges are golden.
Step 3: Slice + Serve
-
Let it cool for 2–3 minutes, then slice into strips with a pizza cutter.
-
Serve with warm marinara. Watch that cheese stretch. Try not to eat the whole tray. (No promises.)
Freezing Instructions
To freeze:
- Let baked breadsticks cool completely.
- Wrap tightly in foil or plastic wrap, then place in a freezer bag.
- Freeze for up to 2 months.
To reheat:
Bake straight from frozen at 350°F for 10–12 minutes, or until hot and melty.
Final Thoughts
This cheesy bread hits every craving button: warm, stretchy, garlicky, and just indulgent enough to feel like a treat—but simple enough to make any day of the week.
Whether you’re serving it with soup, sharing it on game night, or eating it standing over the stove in your sweats (hi, me), it’s a guaranteed win.
📌 Save this recipe for your next carb emergency. Or better yet—make a double batch now and thank yourself later.


