How to Make Your Own Graphic Tees at Home: A Beginner’s Guide
This post contains affiliate links. Click here to read my affiliate policy.
Last Updated on September 4, 2026
Making your own graphic tee at home is easier than it looks. You don’t need a professional print shop or a room packed with specialist equipment. With a good blank shirt, a well-planned design, the right transfer method, and careful pressing, you can turn an idea into something you’ll genuinely want to wear.
It’s also a fun way to make personalized clothing for birthdays, family events, vacations, gifts, or simply your own wardrobe. Before you start pressing, though, a little preparation will make a big difference.
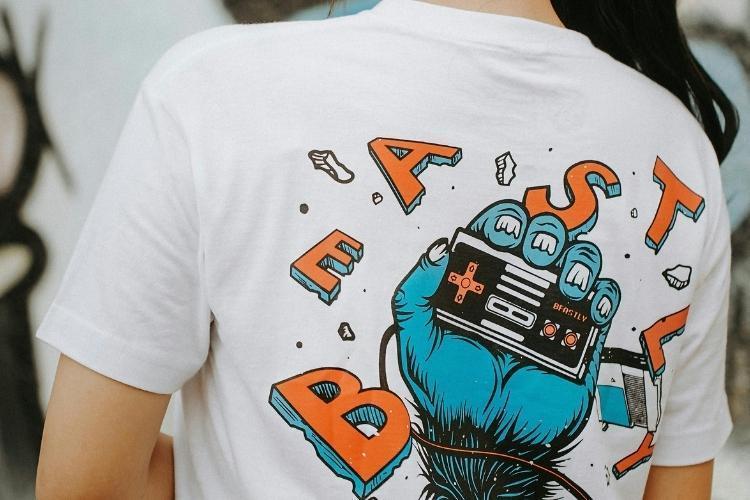
[Image by Kenneth Surillo from Pexels on Canva]
Choose a Design That Works on a T-Shirt
A design that looks great on a laptop screen won’t automatically look great across a T-shirt. Start by thinking about the size, shape, colors, and placement of your artwork.
If you aren’t sure about sizing, print the design on ordinary paper at roughly the dimensions you have in mind. Cut it out, place it on the shirt, and look at it from a few feet away. This simple test helps you spot graphics that feel too large, too small, too high, or too low before you permanently apply anything.
Pay close attention to contrast, too. Dark artwork can disappear on a black or navy shirt, while pale colors may get lost against white or cream fabric. Small lettering and fine details also need to remain readable once you reduce the design to its final size.
Next, choose how you’ll transfer the artwork. Options include heat-transfer vinyl, transfer paper, screen printing, and ready-to-press transfers. DTF transfers can work particularly well for detailed or multicolored artwork because you can apply the prepared graphic with heat rather than cutting and layering separate pieces of vinyl. Look for providers offering dtf transfer printing to prepare your artwork as a transfer before pressing it onto a garment.
Whichever option you use, prepare a clean, sharp design file and follow the instructions that come with your chosen transfer. Don’t assume that every type of transfer uses the same temperature, pressure, or peeling technique.
Pick a T-Shirt That Suits the Project
The blank shirt matters almost as much as the artwork. Instead of grabbing the first plain tee you see, check the fabric label and think about how you want the finished shirt to feel.
Cotton, polyester, and blended fabrics can react differently to heat, and some transfer materials suit certain fabrics better than others. Check that your chosen transfer works with the garment before you start. This matters even more with fabrics that can scorch, discolor, or react badly to high temperatures.
Fit also changes the appearance of a graphic. An oversized print can look at home on a loose, boxy tee but overwhelm a narrow fitted shirt. Likewise, a small chest graphic may suit a simple everyday tee better than a large design would.
If the shirt or transfer instructions recommend prewashing, wash and dry the garment before decorating it. This lets any early garment shrinkage happen first and can remove manufacturing residue. Avoid adding fabric treatments that your transfer instructions advise against.
Finally, inspect the pressing area. Remove lint and smooth out wrinkles. Seams, pockets, buttons, zippers, and other raised sections can prevent even pressure, so keep them away from the area you plan to decorate whenever possible.
Get the Placement Right Before Pressing
Once heat enters the picture, you have much less room to correct mistakes. Take your time with placement.
Lay the shirt on a flat surface and smooth it into its natural shape. Find the center of the garment and the center of your graphic, then align them. A ruler or T-shirt alignment tool can help, but don’t rely on measurements alone. Step back and look at the shirt as someone would see it when worn.
Neckline shape can affect where a design looks balanced. A graphic placed at the same measured distance from the collar may look different on a crew neck than it does on a V-neck. Design size matters too. Larger graphics often need slightly different positioning from small chest prints.
Some transfer instructions call for a short pre-press before you position the artwork. This can flatten wrinkles and remove moisture from the fabric. Only do this when it suits the garment and transfer you’re using.
Press According to the Transfer Instructions
Good pressing depends on more than heating the surface. Temperature, pressure, pressing time, and peeling method all play a role, and those requirements can vary between transfer products.
Use the settings supplied with your transfer rather than guessing or copying settings from an unrelated tutorial. A heat press makes it easier to control these factors consistently, although some products may support other heating methods. Check the instructions before using a household iron or handheld press as a substitute.
Keep the garment as flat as possible while pressing. Raised seams or folds can create uneven contact, leaving parts of the design poorly adhered.
Pay attention to peeling instructions too. Some carrier films need a particular cooling or peeling process. Removing one too early could affect the application. If part of the graphic doesn’t attach correctly, check the supplier’s instructions before immediately pressing it again.
For your first attempt, consider practicing with a spare compatible shirt or fabric. A test run lets you learn how your equipment behaves without risking a favorite tee.
Look After Your Finished Graphic Tee
After you finish pressing, let the design settle according to the transfer manufacturer’s directions. Don’t rush straight from the press to the washing machine.
When the shirt is ready to wash, follow the care instructions for both the garment and the transfer. Turning graphic tees inside out before washing can reduce direct rubbing against the printed surface. Take similar care when drying and ironing.
Never assume you can place a hot iron directly over a graphic. Check the care directions first. Heat that helps apply a transfer can also damage a finished print when used incorrectly later.
Final Thoughts
Making graphic tees at home becomes much simpler once you break the process into a few manageable decisions. Start with artwork that suits the size and color of your shirt. Match the garment to your transfer method, check your placement carefully, and follow the correct pressing instructions instead of guessing.
Your first design doesn’t have to be complicated. A favorite phrase, simple illustration, or small chest graphic makes a great starting project. Once you get comfortable with sizing, positioning, and pressing, you can experiment with bolder artwork and different garment styles. Before long, that stack of plain tees may start looking a lot more interesting.