This post contains affiliate links. Click here to read my affiliate policy.
Last Updated on December 17, 2023
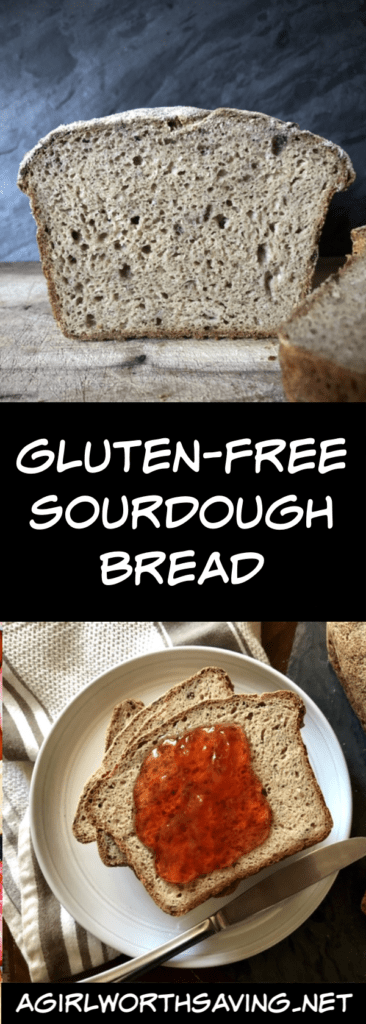
Making high-quality sourdough bread at home has become more common. For those looking for gluten free sourdough bread, there are very few options on the market and they often cost an incredible amount. And honestly, sometimes they taste like cardboard. This Gluten free Sourdough Bread makes the perfect toast! It’s light, airy and has the perfect chew so you can enjoy sandwiches again.
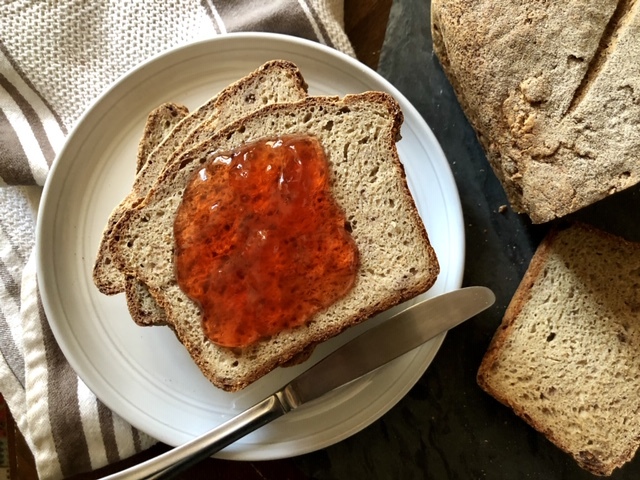
High atop the mountain of master home baker challenges sits the sourdough bread. Both exciting and intimidating – making sourdough feels less like cooking and more like caring for a small animal that needs to be fed and watered and is picky about the temperature of your kitchen.
I wanted to stay true to the basic ingredients and techniques involved in classic sourdough bread making while developing this gluten-free recipe because it’s such a beautifully natural process to begin with. Flour, water, yeast, and salt – that’s all of the essential ingredients needed to make a stunning loaf of bread.
Some of the recipes I researched called for eggs, baking powder and baking soda, butter, sugar or vinegar. While all of these ingredients have their place in the breadmaking world and provide structure, aeration, and flavor – I wanted this bread to be simple and classic like my gluten free stuffing.
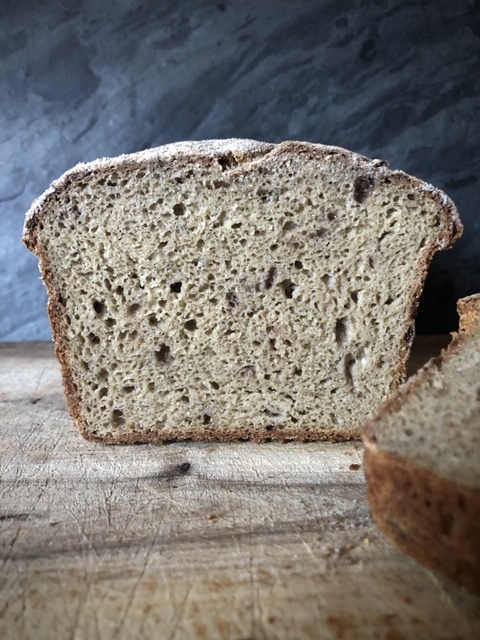
The three major characteristics I was most interested in while developing this gluten free sourdough bread were:
FLAVOR: Obviously, It’s sourdough! Arguably the most important trait of sourdough bread is it’s tangy, complex, earthy, gently sweet flavor. More than the sum of its ingredients, sourdough harnesses the flavors of fermentation and can be a satisfying treat all on its own.
MOISTURE: A fresh loaf of sourdough comes out of the oven steaming. When it’s finally cool enough to cut, a dry crunchy crust gives way to a moist interior. Gluten-free flours tend to produce drier baked goods, which seemed like the biggest challenge. This dough has a high percentage of water making it very sticky to handle, but perfectly moist out of the oven.
TEXTURE: One of the hallmarks of classic sourdough bread is the large gluten webs formed by the leavening gasses during the baking process. Given that this bread is gluten-free, I set my expectations accordingly. I wanted this bread to have the texture of bread, with or without the giant gluten holes. Not chalky, dense, or crumbly. Elastic enough to cut into slices and smear some butter on. Leavened naturally with a wild yeast starter.
The Gluten-free Sourdough “Starter”
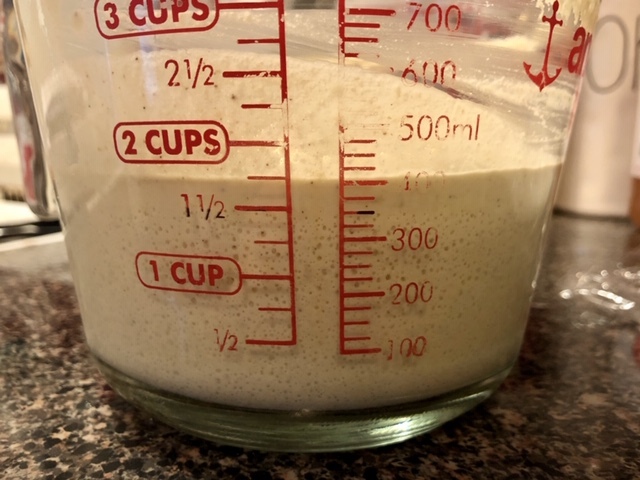
Natural yeast starters usually take several weeks to make and mature. It involves combining water and flour, leaving it out to attract wild yeasts, feeding and watering it on a consistent schedule to develop it, and finally using the fermented “starter” to make bread that leavens naturally.
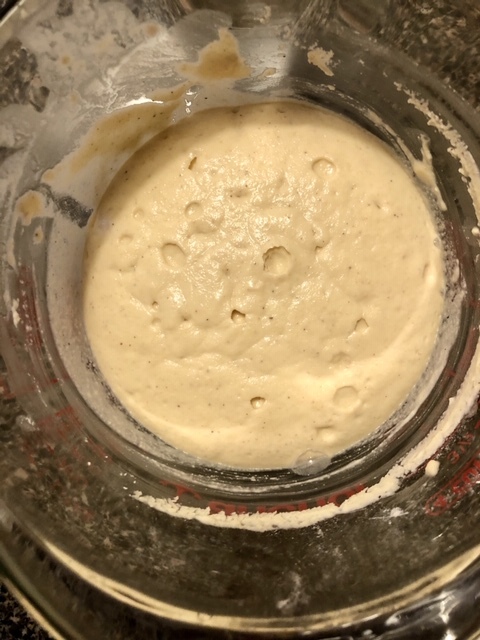
To expedite the process here, I used a dried gluten-free sourdough starter found on Etsy. I watered and fed the starter with gluten-free flour for 5 days to reanimate it before using it to bake.
Gluten-Free Flour and Additions
There are so many gluten-free flour blends on the market today that the options for baking are nearly endless, and it can be difficult to tell which flour to choose. For this bake, I used Arrowhead Mills Gluten-Free All-Purpose Baking Mix which is made mostly of rice flour, sorghum flour, and tapioca starch. Part of the fun of making bread is experimenting with different ingredients, but if you want to make your bread resemble this one as closely as possible, I’d suggest getting this, or a similar formula of gluten-free flour.
Additionally, I include buckwheat flour and psyllium husk powder in this recipe. The buckwheat flour is added to support the earthy bittersweet sourdough flavors. The color is reminiscent of Irish brown bread. Psyllium husk powder is high in fiber and mimics the gluten that would otherwise be provided by wheat. While it’s not an identical ingredient, it helps build structure.
While standard measurements are given for this recipe, I highly suggest using a scale to weigh out your ingredients.

Gluten Free Sourdough Bread
This gluten-free sourdough bread recipe offers a delicious alternative for those with dietary restrictions, providing a tangy and airy loaf without compromising on taste or texture.
Ingredients
Instructions
The evening before you plan on baking, feed your thriving starter generously with flour and water, bringing it to a thicker pancake batter consistency.
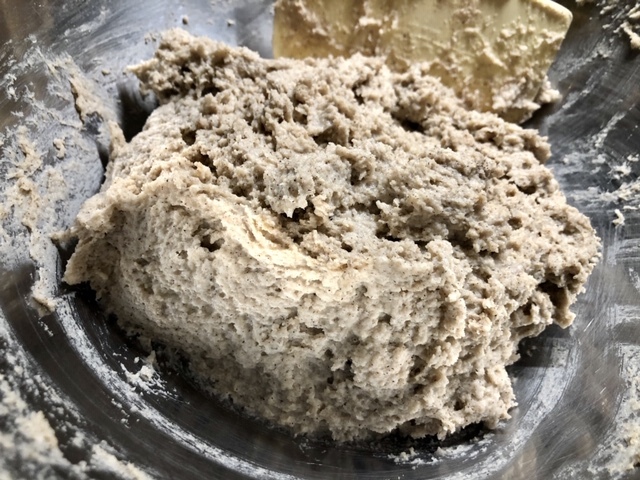
Scale all of your ingredients into a bowl and stir with your hand or bowl scraper until the dough has come together. It will be very sticky, but should have the texture of a moist cookie dough. If you need to add flour or water to get it there, add it a tablespoon at a time.
Transfer the dough to a vessel of your choice to proof. If you want to bake a round loaf, use a parchment-lined bowl to proof your dough, covered in plastic to keep moist. If you’d prefer a loaf, transfer your dough to a well-greased or parchment-lined 9x5” loaf pan.
PROOFING - There are two ways you can proof your bread. The faster way: Turn your oven to 100℉ and place the rack you’d like to bake on unobstructed in the center of the oven. Leave your dough to proof in the oven for about 4 hours, checking on its progress every hour or so. You’re looking for the dough to double in size. Remove the dough from the oven, and turn it up to 425℉ to preheat for 30 minutes. The slower way: Cover your dough with oiled plastic wrap and let sit at room temperature for 8-9 hours. When the dough has nearly doubled, preheat your oven at 425℉ for 30 minutes. This method will yield a more developed sourdough flavor.
If baking a round loaf, you will lift the dough by the parchment and place directly on a sheet tray, baking stone, or gently drop into a pre-heated dutch oven with a lid to bake. If baking in a loaf pan, remove the plastic and place it directly in the oven. I like to sprinkle my bread with a touch of flour and score the top for a more artisanal look.
Bake for 30 minutes. At this point, you can remove the lid of the dutch oven and continue to cook for 20-30 more minutes. Tap the dough gently, listening for a hollow sound.
Allow your bread to cool completely before slicing, then enjoy!
Recommended Products
As an Amazon Associate and member of other affiliate programs, I earn from qualifying purchases.


This looks great and I think I have all ingredients on hand…mostly. I don’t have buckwheat flour but have quinoa flour, would that work?
yes, that will change the flavor a touch but it will work.
I’ve actually been interested in making sourdough bread lately so this is perfect! Thanks so much. Can’t wait to try it out.
Very cool. I have never tried making my own gluten free bread. I’ll have to give it a try!
Wow, this is much easier than I expected and that jam looks like the perfect topping!
There’s nothing better than a delicious slice of bread that’s gluten free!
Omg this is GENIUS!! I’ve been making sourdough for a while now but it’s so nice to see that it is also possible to make it GF! The texture looks amazing, adding this to my list to make!
Gorgeous loaf! I love sourdough and this recipe is so simple!
This is awesome! I’ve been wanting to make this but had no idea where to get a GF sourdough starter. I would have never guessed to look on Etsy!
I have been missing sourdough for so long! The thought of making my own seemed too scary but reading this I think I could actually maybe do it? Thanks for all the info!
Good luck!
I don’t have Sorghum or psyllium Husk. I do have teff. Can I use that instead of the Sorghum. Also can I use Xanthum Gum? If so how much would I need to use. I live in Fiji and GF supplies are limited.
Thanks
Unfortunately, I haven’t tried it with Teff or Xanthan Gum, so I can’t be sure that it will work the same way. Xanthan binds a large amount of water with very little ingredient used, so if you decide to try it I’d recommend using less than the 3 Tablespoons of Psyllium Husk – maybe 1/2 teaspoon. Again, I can’t guarantee the results, but I hope it helps!
When proofing in the oven, do you cover the dough?
Yes, while it’s in the oven keep it covered with lightly oiled plastic wrap.
Weighed out all the ingredients and the dough is still the consistency of runny pancake mix.
This dough is definitely a lot stickier than developed glutinous bread doughs, but should not resemble pancake batter (see image above). If the dough is more liquidy than sticky, I would add more flour a Tablespoon at a time, mixing as you go. The gluten-free rice-based flour is incredibly absorbent so I usually add it slowly. Traditional sourdough has a high ratio of water compared to other doughs, which helps create steam and lift in the baking process – a process I’ve tried to mimic as closely as possible here. I’m sorry it didn’t work for you!
This is exactly what I’ve been looking for, thank you! I’m wondering if you can share what it is *about* the buckwheat flour that made you choose it for this recipe. I’m trying to work with what we have in our pantry during the pandemic, and I’m wondering if I could replace it with anything I have on hand instead of picking up something new based on what place it filled in this recipe. Thanks for any insight you can share!
Hi Mary! I used buckwheat flour in this particular recipe because of the deeper baked flour flavor it imparts in baked goods. It’s a pretty common ingredient in both traditional and gluten-free bread baking, but a little goes a long way. If you’ve got oat flour or even oats to grind in the food processor on hand, that would make a fine and flavorful substitute for the buckwheat. It’s really one of the most flexible ingredients in the recipe, so substitute 1:1 with anything you have on hand and adjust the water as necessary in the mixing process. Best of luck!
Do you think you could make this into buns or smaller loafs without a loaf pan? I have made it twice now in a regular loaf pan and it is amazing. I just wish I could have it as buns or in a smaller loaf!
Yes, you would just need to adjust the cook time 🙂 So glad you like it!
The flour mix you recommend has xanthan gum in it. Your recipe also calls for psyllium husk, so I assume it needs both? Thank you.
Yes, you do Teri 🙂
I’ve been on a sourdough making journey for the past month. I wanted to get a hang of it before attempting this gluten free recipe. I ordered the starter on Etsy so I’m excited to try this out. Do you recommend doing any lift and folds or handling the dough during the proofing? Can I shape my dough with a bench scraper before baking as I would my usual sourdough? Thanks!
You’ve hit on the major difference in technique from classic to gluten-free sourdough making. With traditional sourdough, you typically fold or turn the dough about 3 times during its bulk ferment to develop the gluten structure in the dough. Since there’s no gluten in this particular recipe, there’s also no folding! As a matter of fact, folding or overhandling during the rise will deflate some of the gasses you’re trying to develop. With this recipe you go from the mixing stage directly into the proofing stage, so you’ll shape your dough into the form that fits the baking vessel you’re using. Again, this dough will look and feel different than traditional sourdough, because it is. You’ll find it isn’t as elastic, and moister to the touch than the classic sourdough. Happy Baking!
Hi Kelly, I’m glad you’re in Portland! I’ve made my oen GF sourdough starter and have been baking a total of eight loaves over the past 3 months and came across your recipe. My last two round loaves baked for an hour and half each, a combination of with and without the lid. I was wondering if you had abtip on how to bake the loaf all the way through. Mine tend to be a little moist on the inside still whenever I cut it.
hank you for your question! Different recipes and ingredients will, as I’m sure you’re well aware, yield different results with different cooking times. My top 3 recommendations are 1. Let your bread cool completely before cutting it open (which is that hardest part for me!). This gives your bread a chance to redistribute all of that moisture (now in steam form) back throughout the bread and keeps the tender crumb in the center from collapsing under the knife while warm. 2. Check it with a cake tester before pulling it out of the oven entirely. Hot bread will still be a touch moist, but there shouldn’t be any raw dough stuck to your tester. 3. If you’ve got an internal thermometer, even better! Stick your thermometer into the densest part of your bread when you think it’s done, and you’re looking for it to register at least 205°F (if it’s higher, that’s okay.) You’ll also be able to use the thermometer like a cake tester simultaneously. Best of luck!
Hello, this is the recipe I have been looking for. I have one question. Do you have the nutritional information for this recipe? It looks high fiber, which I want, but I would really like to know the whole picture. Thanks
I just updated the recipe with nutrition information.