This post contains affiliate links. Click here to read my affiliate policy.
Last Updated on January 3, 2024
Oaxaca cheese might not be as well-known as some other Latin American cheeses, like crumbly aged Cotija and squeaky Queso Fresco, but it’s one you should get acquainted with if you aren’t already.
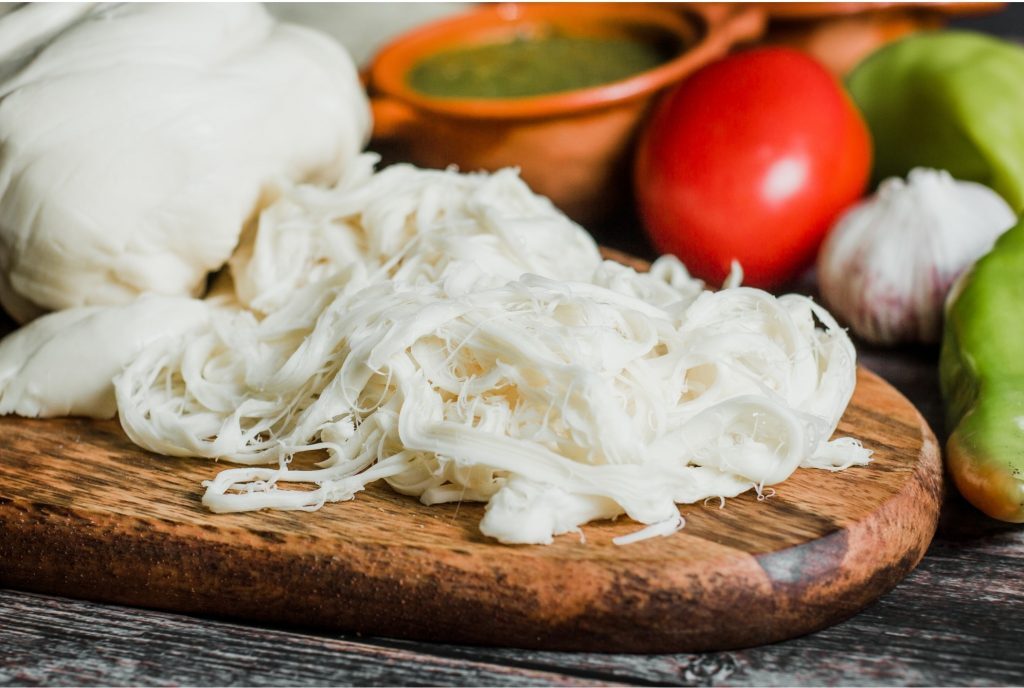
What is Oaxaca Cheese
Very similar to mozzarella, Oaxaca cheese is a fresh stringy cheese that’s easily shredded and used as a topping or easily melted. It’s named after the region in Mexico it originates from, which is also supposed to be the culinary epicenter of Mexico. It is also referred to as “quesillo” cheese in some places, and is the classic cheese used for—you guessed it—quesadillas.
If it’s difficult to find Oaxaca cheese where you are, or even if you’d like to try to make a cheese recipe that’s slightly more complex than ricotta or queso fresco, this quick Oaxaca cheese recipe is a great place to start. The milk, salt, and citric acid used in this recipe should be readily available at grocery stores everywhere. You will likely need to purchase rennet and calcium chloride at a specialty food store, or you can easily find both online.
While calcium chloride is optional, it’s a recommended addition for anyone using pasteurized milk to help replace some of the natural calcium that was lost in the pasteurization process—which in turn yields more and stronger curds.
This recipe uses citric acid instead of a thermophilic starter culture, which is found in many similar recipes for cheeses. While the thermophilic starter helps develop the acids in the milk, the process can take anywhere from a few hours to several days to reach the right pH. The citric acid method used here cuts out hours of waiting and development by adding the acid directly to the milk for a quicker cheese recipe that you can make today, in about an hour.
Does Oaxaca Cheese Melt?
A fresh cheese with a mild buttery flavor, oaxaca melts easily, making it an excellent baking cheese
Once you’ve got your fresh Oaxaca cheese in hand, it’s time to cook! Shred it up and use it on top of a chicken enchilada casserole. Sprinkle some on top of your favorite tacos. Or if you’re feeling especially adventurous, use it to stuff the peppers in this Cheesy Chile Rellenos recipe!
Oaxaca Cheese Recipe Details
Makes: 2 baseball-sized balls
Prep Time: 5 minutes
Hands-On Time: 1 hour
Total Time: 1½ hours
Cheesemaking Tools
Large stock pot with lid
Instant-read digital thermometer
Rubber spatula
Large slotted spoon or ladle
Knife to cut curds
ColanderCollander/Strainer
Large bowl
Liquid measuring cup & spoons
Rubber gloves (optional, but highly recommended for stretching the curds in extremely hot water)
Ingredients
1 gallon Whole Milk – Raw, or Pasteurize – Not Ultra-Pasteurized
¼ teaspoon Calcium Chloride (optional but recommended)
1½ teaspoons Citric Adic
¼ teaspoon Rennet, liquid single strength
1 teaspoon Kosher salt or “cheese salt”
1½ cups Distilled Water
How to Make Oaxaca Cheese:
- Begin with a clean stovetop and workspace. Ideally, all of your surfaces should be sanitized before making cheese. Have all of your tools ready and close at hand.
- Measure out the following, into three separate glasses:
- Begin with a clean stovetop and workspace. Ideally, all of your surfaces should be sanitized before making cheese. Have all of your tools ready and close at hand.
- Measure out the following, into three separate glasses:
- Pour the calcium chloride solution into the pot, followed by your gallon of milk, and finally the citric acid solution. Over low heat, constantly stir the milk with a rubber spatula, and bring the milk to 90°F. Immediately turn off the heat and remove your pot from the burner.
- Add the rennet solution to the warmed milk and stir for 30 seconds in a figure 8 pattern, and then around to make sure the rennet is completely mixed-in. Remove the spatula, put the lid on the pot, and leave it undisturbed for 10 minutes.
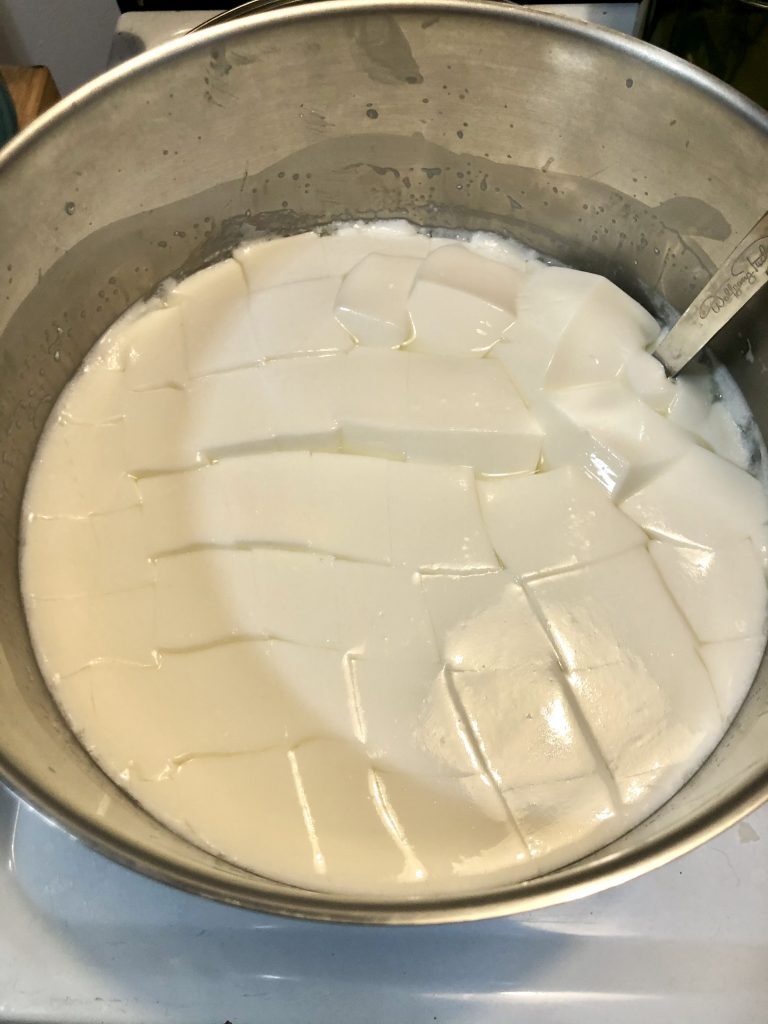
- After 10 minutes, remove the lid and slice the curds. Using a long sharp knife for clean cuts, make ½ to 1-inch slices across the curd in one direction, and then again in the opposite direction to form a grid pattern.
- Return pot to the stove over low heat. With your slotted spoon or ladle, very gently stir the curds, and bring the temperature of the whey up to 110°F. The curds will begin to break up in some places, separate from the whey entirely, and even sink to the bottom of the pot as they warm up. Just keep stirring as carefully and slowly as you can until the thermometer reaches 110. Then remove the pot from the burner once again.
- Continue to stir the curds slowly off-heat for about 3 minutes, then let them rest at the bottom of the pot for about 5 minutes. In the meantime, grab a colander (lined with damp cheesecloth or a damp paper towel if your strainer’s holes are rather large), and rest it over a deep bowl or another pot.
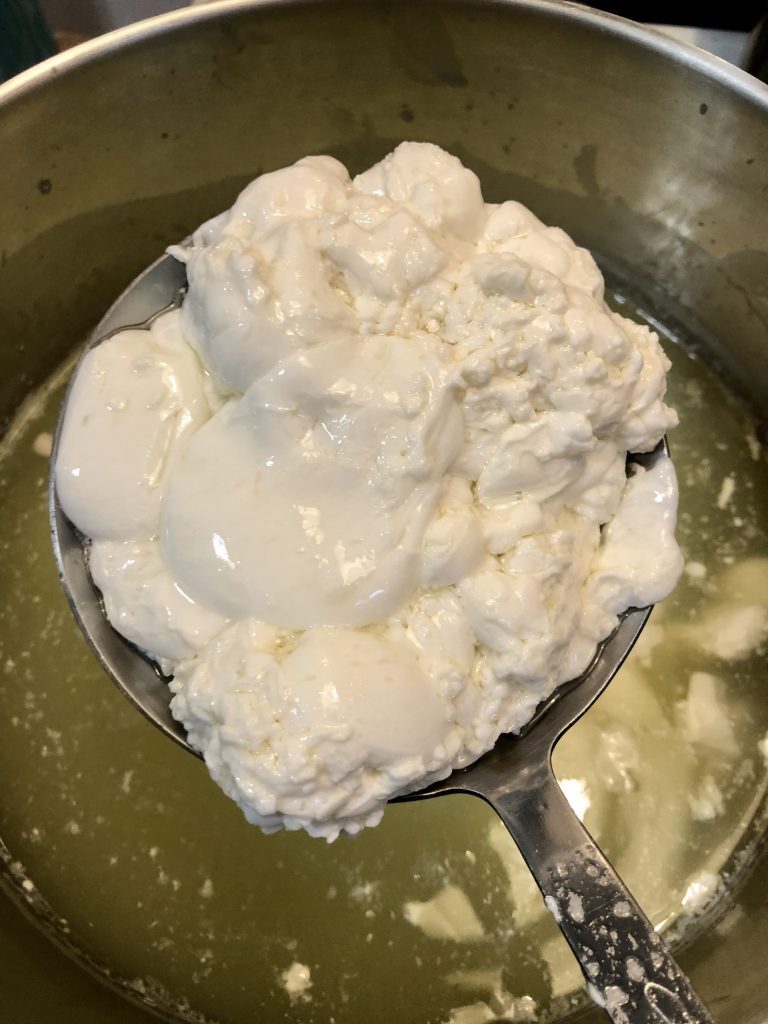
- Scoop the curds out of the warm whey, and into your prepared colander. When you think you’ve got most of them out, carefully pour the rest of the whey through the colander to get all the remaining bits of curd. Make sure the bottom of the colander isn’t resting in the drained whey, and move if necessary. Sprinkle the top of the curds with 1 teaspoon of salt, and fold them over. Let the curds drain for at least 30 minutes, flipping the mound halfway through.
- While the curds are finishing the draining process, Heat a large pot of water to about 175°F (steaming, just before simmering). You can work your curds in the next step directly in this pot, but I find it more useful to have a separate bowl to work the curds in that I pour hot water into as the temperature drops. You are also welcome to use some or all of the drained whey in place of water here, but I find the murkiness a little more challenging to work with.
- Once curds have spent 30 minutes draining, cut the curd block in half. You’ll be forming two baseball-sized balls of cheese. Take one half, and break or cut it into 1 to 2-inch chunks, and place in a large bowl. Pour enough steaming water into the bowl (down the side of the bowl so you don’t inundate your delicate curds), until the curds are completely covered with an inch or two of water. Let the curds sit and warm-up for about 2 minutes.
- With your slotted spoon, begin gathering and mashing the curds together in the bowl. If they haven’t softened-up enough to mash together, give them another minute. As the curds come together in a mound, pick them up and begin to stretch and fold them. At first, the mass will look shaggy, and maybe even grainy, but as you pull and fold it, the curd will begin to build tension and the texture will smooth out. Repeat the pulling and folding process a few times, returning the mass to the hot water for a few seconds as needed.
*Note: This process may be easier to handle by working with the curd mass in two parts instead of trying to stretch the entire mass in the next step.
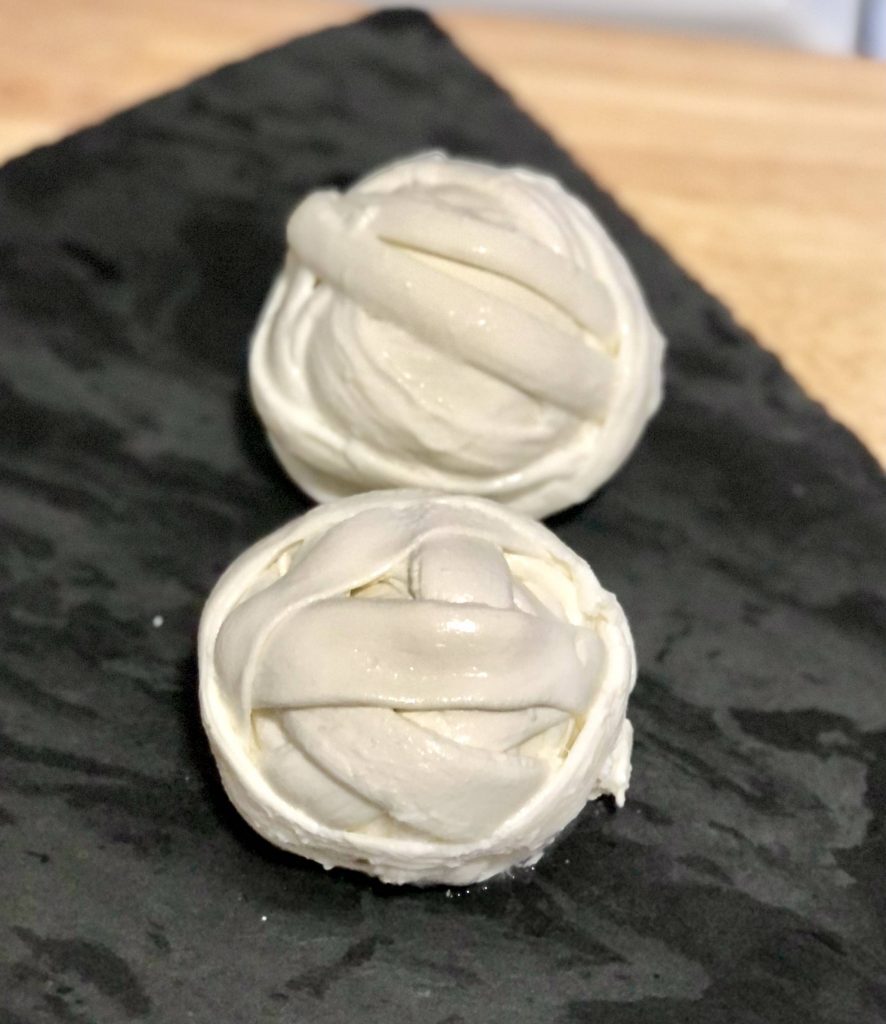
- Once your curd mass is stretching and the texture is smooth, begin pulling the entire mass as uniformly as possible, like a rope of taffy. Pull for a few seconds, then dip in the hot water for a few seconds. Then stretch again and repeat this process until your curd has been stretched into long wide ribbons. Transfer the cheese ribbons to icy cold water to stop cooking.
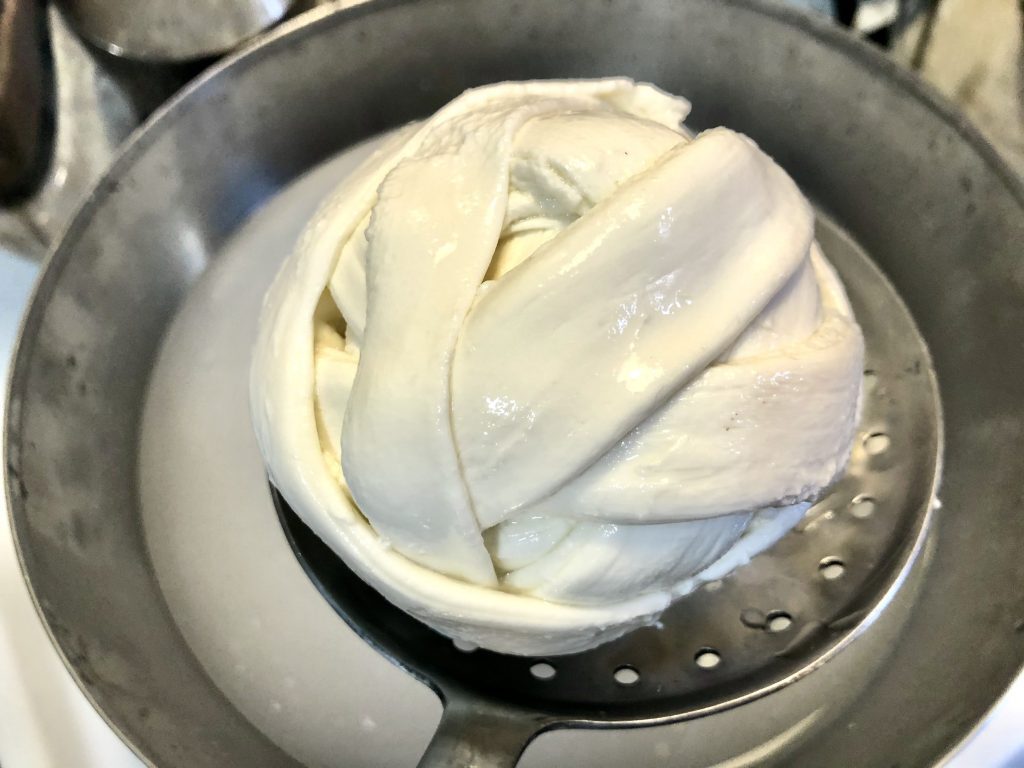
- Once the ribbons have chilled, you can begin wrapping them as you would a ball of yarn. Once you get to the end of the rope, simply tuck the end under an adjacent strand. Let drain for an hour or so on a cooling rack, or eat fresh! To store, tightly wrap with plastic or store in a plastic container. Use within three days for best results.
You will quickly get the hang of stretching the cheese by the second or third piece of curd you begin to pull. Don’t be discouraged if the ribbons aren’t all perfectly uniform—you’re shredding them up eventually anyway!
Quick Oaxaca Cheese Recipe
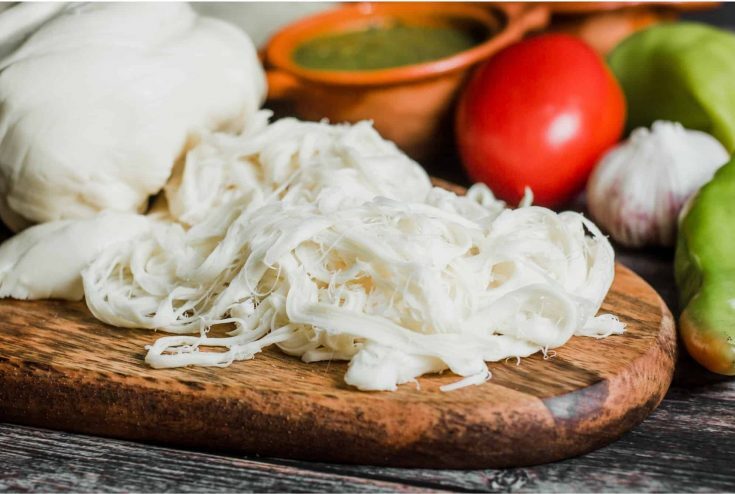
Oaxaca cheese is a fresh stringy cheese that’s easily shredded and used as a topping or easily melted.
Ingredients
- 1 gallon Whole Milk - Raw, or Pasteurized - Not Ultra-Pasteurized
- ¼ teaspoon Calcium Chloride (optional but recommended)
- 1½ teaspoons Citric Acid
- ¼ teaspoon Rennet, liquid single strength
- 1 teaspoon Kosher salt or “cheese salt”
- 1½ cups Distilled Water
Instructions
Begin with a clean stovetop and workspace. Ideally, all of your surfaces should be sanitized before making cheese. Have all of your tools ready and close at hand.
Measure out the following, into three separate glasses:
¼ teaspoon of Calcium Chloride into ¼ cup Distilled Water
¼ teaspoon of liquid rennet into ¼ cup Distilled Water
1½ teaspoons of Citric Acid into 1 cup Distilled Water
Pour the calcium chloride solution into the pot, followed by your gallon of milk, and finally the citric acid solution. Over low heat, constantly stir the milk with a rubber spatula, and bring the milk to 90°F. Immediately turn off the heat and remove your pot from the burner.
Add the rennet solution to the warmed milk and stir for 30 seconds in a figure 8 pattern, and then around to make sure the rennet is completely mixed-in. Remove the spatula, put the lid on the pot, and leave it undisturbed for 10 minutes.
After 10 minutes, remove the lid and slice the curds. Using a long sharp knife for clean cuts, make ½ to 1-inch slices across the curd in one direction, and then again in the opposite direction to form a grid pattern.
Return pot to the stove over low heat. With your slotted spoon or ladle, very gently stir the curds, and bring the temperature of the whey up to 110°F. The curds will begin to break up in some places, separate from the whey entirely, and even sink to the bottom of the pot as they warm up. Just keep stirring as carefully and slowly as you can until the thermometer reaches 110. Then remove the pot from the burner once again.
Continue to stir the curds slowly off-heat for about 3 minutes, then let them rest at the bottom of the pot for about 5 minutes. In the meantime, grab a colander (lined with damp cheesecloth or a damp paper towel if your strainer’s holes are rather large), and rest it over a deep bowl or another pot.
Scoop the curds out of the warm whey, and into your prepared colander. When you think you’ve got most of them out, carefully pour the rest of the whey through the colander to get all the remaining bits of curd. Make sure the bottom of the colander isn’t resting in the drained whey, and move if necessary. Sprinkle the top of the curds with 1 teaspoon of salt, and fold them over. Let the curds drain for at least 30 minutes, flipping the mound halfway through.
While the curds are finishing the draining process, Heat a large pot of water to about 175°F (steaming, just before simmering). You can work your curds in the next step directly in this pot, but I find it more useful to have a separate bowl to work the curds in that I pour hot water into as the temperature drops. You are also welcome to use some or all of the drained whey in place of water here, but I find the murkiness a little more challenging to work with.
Once curds have spent 30 minutes draining, cut the curd block in half. You’ll be forming two baseball-sized balls of cheese. Take one half, and break or cut it into 1 to 2-inch chunks, and place in a large bowl. Pour enough steaming water into the bowl (down the side of the bowl so you don’t inundate your delicate curds), until the curds are completely covered with an inch or two of water. Let the curds sit and warm-up for about 2 minutes.
With your slotted spoon, begin gathering and mashing the curds together in the bowl. If they haven’t softened-up enough to mash together, give them another minute. As the curds come together in a mound, pick them up and begin to stretch and fold them. At first, the mass will look shaggy, and maybe even grainy, but as you pull and fold it, the curd will begin to build tension and the texture will smooth out. Repeat the pulling and folding process a few times, returning the mass to the hot water for a few seconds as needed.
*Note: This process may be easier to handle by working with the curd mass in two parts instead of trying to stretch the entire mass in the next step.
Once your curd mass is stretching and the texture is smooth, begin pulling the entire mass as uniformly as possible, like a rope of taffy. Pull for a few seconds, then dip in the hot water for a few seconds. Then stretch again and repeat this process until your curd has been stretched into long wide ribbons. Transfer the cheese ribbons to icy cold water to stop cooking.
Once the ribbons have chilled, you can begin wrapping them as you would a ball of yarn. Once you get to the end of the rope, simply tuck the end under an adjacent strand. Let drain for an hour or so on a cooling rack, or eat fresh! To store, tightly wrap with plastic or store in a plastic container. Use within three days for best results.
You will quickly get the hang of stretching the cheese by the second or third piece of curd you begin to pull. Don’t be discouraged if the ribbons aren’t all perfectly uniform—you’re shredding them up eventually anyway!
If you would like to share these delicious cheeses you have made following this recipe with your family and friends, you can package them up and label them with your own unique production logo, give them away or even sell them. Custom Stickers. com allows you to customize your handmade treats with unique labels, stickers and more to make them look even more unique and popular. Get a discount on bulk orders of custom die cut stickers now!


I never knew making cheese could be this easy! Definitely going to have to try this.
Never had this cheese before but it looks super yum and easy and perfect for the next time I make Mexican!
Who knew it was this quick and easy to make delicious cheese? It’s going to be so good sprinkled on everything!
That looks so interesting! I’ve never had Oaxaca cheese. But it looks so easy – definitely worth a try!
Pretty sure that with all your detailed step by steps, I can make my own cheese for the first time! And, I think the Oaxaca variety looks amazing and so perfect for shredding and melting!
Wow, making your own cheese is such a fun project! Definitely a fun activity I’ll try this weekend.
What is the difference between this recipe and process compared to the quick mozzarella recipes found on google?
I literally just did this. Got a cheap cheese making kit online which came with everything you listed. I can’t believe how they have turned out. I live in the UK and this cheese is impossible to find. I NEVER knew this was so easy. Was a little grainy to begin with but all came together as you say. Absolute legend! I’m makingv birria tacos tomorrow. Everything from scratch. Even the bloody cheese now! Thank you!!!